Worm Composting: What It Is, How It Works, and How to Start
Most composting methods rely on heat and time. Worm composting skips both. Red wiggler worms process kitchen scraps at room temperature, in a bin that fits under your sink, and produce castings that outperform conventional compost in virtually every soil test. A 2011 meta-analysis in Bioresource Technology found that vermicompost significantly increases plant growth, yield, and nutrient uptake compared to traditional compost and commercial fertilizers, across dozens of crop types.
If you’ve been thinking about composting but don’t have outdoor space, don’t want to manage a hot pile, or just want a system that works year-round indoors, worm composting is likely your best option. Here’s how it works, what it takes, and how to decide if it’s right for you.
The Science Behind Worm Composting
Worm composting (also called vermicomposting) uses a specific species of earthworm: Eisenia fetida, commonly known as the red wiggler. These aren’t the earthworms you find in your garden. Red wigglers are epigeic (surface-dwelling) worms that evolved to live in decaying organic matter, not soil. They thrive in shallow bins, tolerate crowding, and reproduce quickly in captivity.
The process is aerobic decomposition accelerated by biology. Worms consume organic waste, grind it in their gizzard, and excrete vermicast (worm castings), a concentrated, microbially-rich soil amendment. Unlike hot composting, which relies on thermophilic bacteria reaching 130-160°F (54-71°C), worm composting works at 55-80°F (13-27°C). The worms do the heavy lifting that heat does in a traditional pile.
What makes castings special isn’t just the nutrient content. It’s the biology. Vermicast contains plant growth hormones, beneficial microbes, and humic acids that improve soil structure and water retention. Research published in Pedobiologia has shown that worm-processed material suppresses certain plant diseases and promotes root development in ways that conventional compost doesn’t.
How Worm Composting Works (Step by Step)
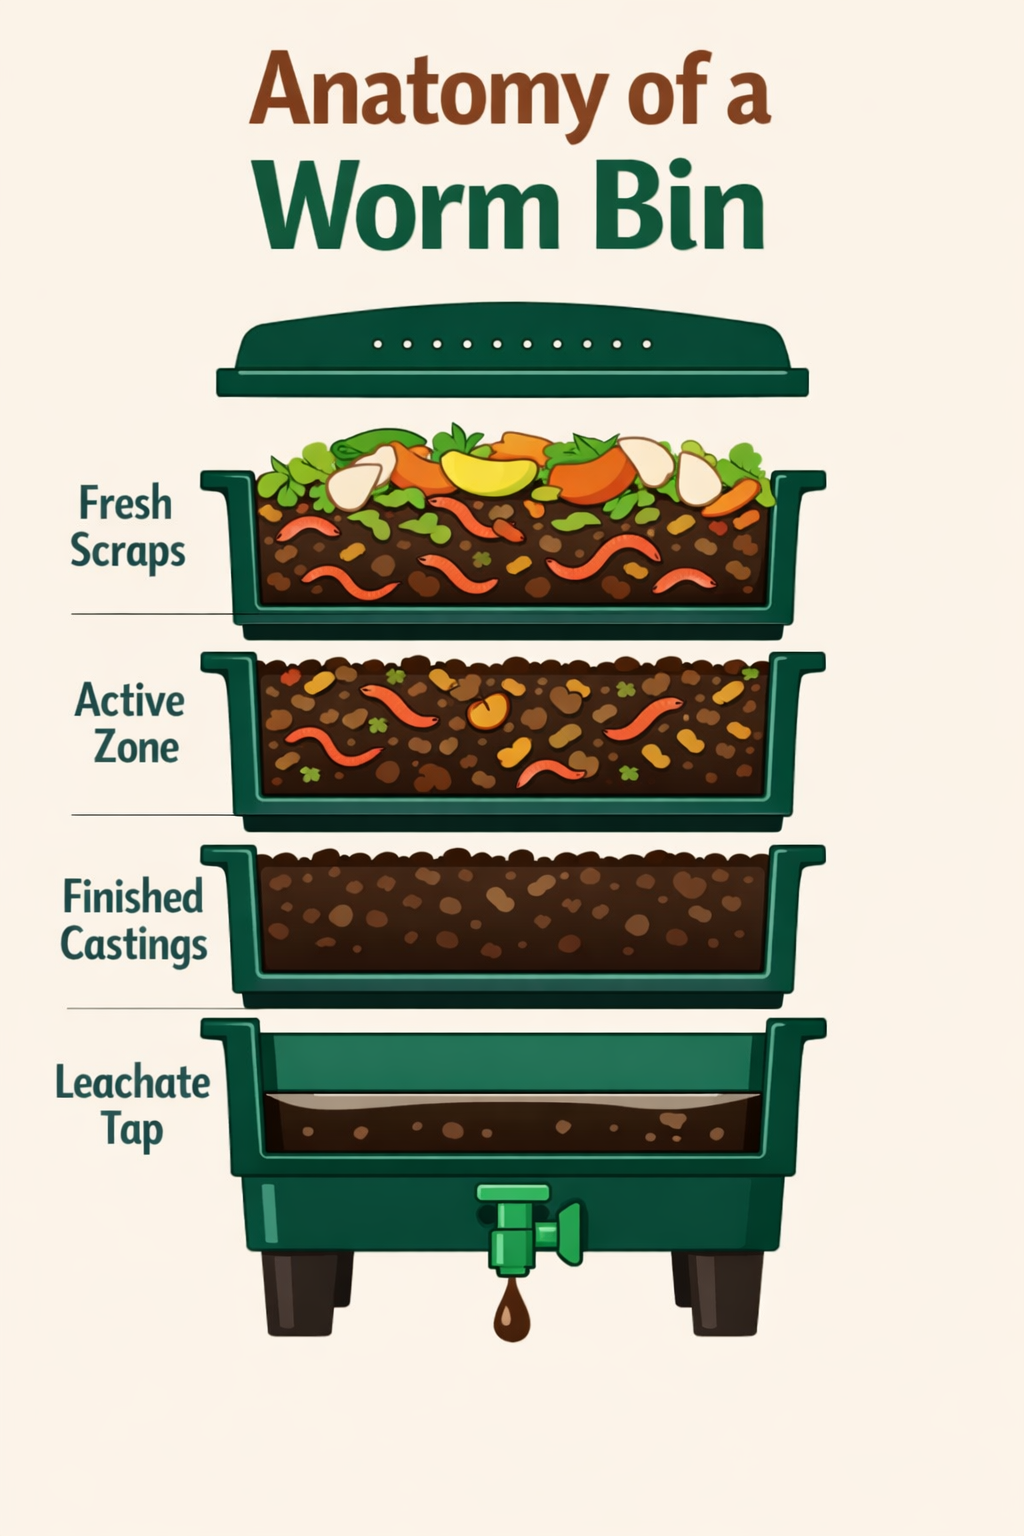
Step 1: Set up the bin. You need a shallow, ventilated container, purchased or DIY. Multi-tray systems (like the VermiHut Plus or Worm Factory 360) make harvesting easier, but a simple 10-gallon plastic bin with drilled holes works fine to start.
Step 2: Prepare bedding. Fill the bin with moist, shredded bedding: newspaper, cardboard, coconut coir, or dried leaves. This is the worms’ habitat and carbon source. Aim for the moisture of a wrung-out sponge.
Step 3: Add worms. Start with about 1 pound of red wigglers (~1,000 worms). They’ll double in population within 3-4 months under good conditions. Bury a small amount of food scraps under the bedding to start.
Step 4: Feed regularly. Add kitchen scraps 1-2 times per week, always buried under bedding. A pound of worms processes roughly half a pound of food per day. Don’t overfeed: that’s the #1 beginner mistake.
Step 5: Harvest castings. After 2-4 months, the bottom of the bin (or lower trays) will be dark, earthy-smelling castings. Push finished material to one side, add fresh bedding and food to the other, and the worms migrate on their own within a week.
📝 Editor’s note: We’ve been running a worm bin year-round for a few years now. The learning curve is about two weeks, mostly figuring out how much to feed. After that, it’s genuinely 10 minutes of maintenance per week.
What Worms Can (and Can’t) Eat
Yes, most kitchen scraps: fruit and vegetable peels, coffee grounds and filters, tea bags, crushed eggshells, bread in small amounts, rice and pasta (cooked, small amounts), shredded paper and cardboard.
No: meat, fish, dairy, oils and greasy food, citrus in large quantities (too acidic), onions and garlic (worms avoid them), pet waste, treated or glossy paper.
The key difference from bokashi composting: worms can’t handle proteins and fats. But for the 70-80% of kitchen waste that’s fruit, vegetable, and grain-based, they’re more efficient than any other home system.
Worm Composting vs Traditional Composting
Space: A worm bin fits in a kitchen, closet, or balcony. A compost pile needs a yard. If you’re composting in an apartment, worm composting is one of the most practical choices.
Speed: Worms produce usable castings in 2-4 months. A cold compost pile takes 6-12 months. A hot pile can finish in 6-8 weeks but requires active management.
What it accepts: A compost pile handles yard waste, leaves, branches: large volumes of outdoor material. A worm bin handles kitchen scraps efficiently but can’t process yard waste or woody material.
Output: Worm castings are more concentrated and biologically active than regular compost. You get less volume, but higher quality per pound.
Cost: A compost pile costs nothing to run after setup. A worm bin has minimal ongoing costs (bedding material), but the worms themselves and the bin require an initial investment of $50-150.
The practical reality: They complement each other. Many experienced gardeners use a worm bin for kitchen scraps year-round and a compost pile for seasonal yard waste. You don’t have to choose one.
The Honest Trade-Off
Worm composting has three real limitations worth knowing upfront.
Temperature sensitivity. Red wigglers are comfortable between 55-80°F (13-27°C). Below 50°F (10°C) they slow down dramatically; above 90°F (32°C) they can die. If your bin lives in an uninsulated garage, you’ll need a plan for extreme seasons.
It’s a living system. Unlike a compost pile you can ignore for weeks, worms need consistent feeding and moisture. Going on a two-week vacation? You’ll need to prep the bin with extra bedding and food, or ask someone to check on it.
Startup cost. A quality multi-tray bin runs $50-120. Red wigglers cost $30-45 per pound. That’s $80-165 to start, not expensive, but not free like a backyard pile.
That said: the system is genuinely low-maintenance once established, works year-round indoors, produces the highest-quality soil amendment available to home gardeners, and handles the daily kitchen scraps that would otherwise go to landfill. For most people, especially apartment dwellers and small-space gardeners, the trade-offs are well worth it.
Getting Started
The fastest path: get a multi-tray bin, a pound of red wigglers, and some coconut coir for bedding. Start feeding lightly and increase as the worm population grows.
See our best worm bins roundup for specific recommendations based on real owner data.
Want to go deeper into the biology, troubleshooting, and long-term management? Worm Farming Secrets is a comprehensive course and membership covering red wiggler biology, advanced feeding strategies, and scaling a home worm operation.
FAQ
Is worm composting worth it?
For most households, yes. A worm bin processes 3-4 pounds of kitchen scraps per week, diverts 200+ pounds of waste from landfill annually, and produces castings worth $1-2 per pound if you were to buy them. The payback period on a $100 bin setup is roughly one year in soil amendment savings, faster if you garden actively.
Can I do worm composting indoors?
Yes, that’s one of its biggest advantages. A properly maintained worm bin has no odor (it smells like forest floor). It fits under a kitchen sink, in a closet, on a balcony, or in a laundry room. The worms are quiet and contained. Most indoor worm composters say visitors don’t even notice the bin.
How long does worm composting take?
First usable castings appear in 2-3 months. A full bin harvest typically happens every 3-4 months. The system runs continuously: you’re always adding scraps to one area while castings finish in another.
Does a worm bin smell?
A healthy bin smells like damp earth, pleasant or neutral. Bad smell means something’s off: overfeeding (food rotting faster than worms can process), too much moisture, or anaerobic conditions. All fixable within a day or two. See our guide on why compost smells bad for troubleshooting.
How many worms do I need to start?
One pound (~1,000 red wigglers) is the standard starting amount for a household bin. They’ll double in population within 3-4 months. Start feeding lightly and increase as the population grows. The worms self-regulate based on available food and space.
Can I use regular earthworms for composting?
No. Garden earthworms (like Lumbricus terrestris) are deep-burrowing species that need soil, cool temperatures, and vertical space. They won’t survive in a shallow bin. Red wigglers (Eisenia fetida) are specifically adapted to surface-level decomposition and confined spaces, making them the only practical choice for home worm composting.
What happens to the worm bin in winter?
If the bin is indoors, nothing changes: room temperature works year-round. If it’s in an unheated space, insulate it (blankets, straw, foam panels) or move it inside when temperatures drop below 50°F. Worms slow their feeding in cold conditions and can die below freezing. An indoor location between 55-75°F (13-24°C) is ideal.
You might also like
Free for beginners
Get the Free Composting Starter Kit
5-day email course + printable guide + our top product picks. Everything you need to start composting confidently.
Get Free AccessNo spam. Unsubscribe any time.